How to Use IPOasis 's Proxies in MoreLogin

Getting started with IPOasis
Try IPOasis For Free' with the link-https://www.ipoasis.com/
How Does an Antidetect Browser Work?
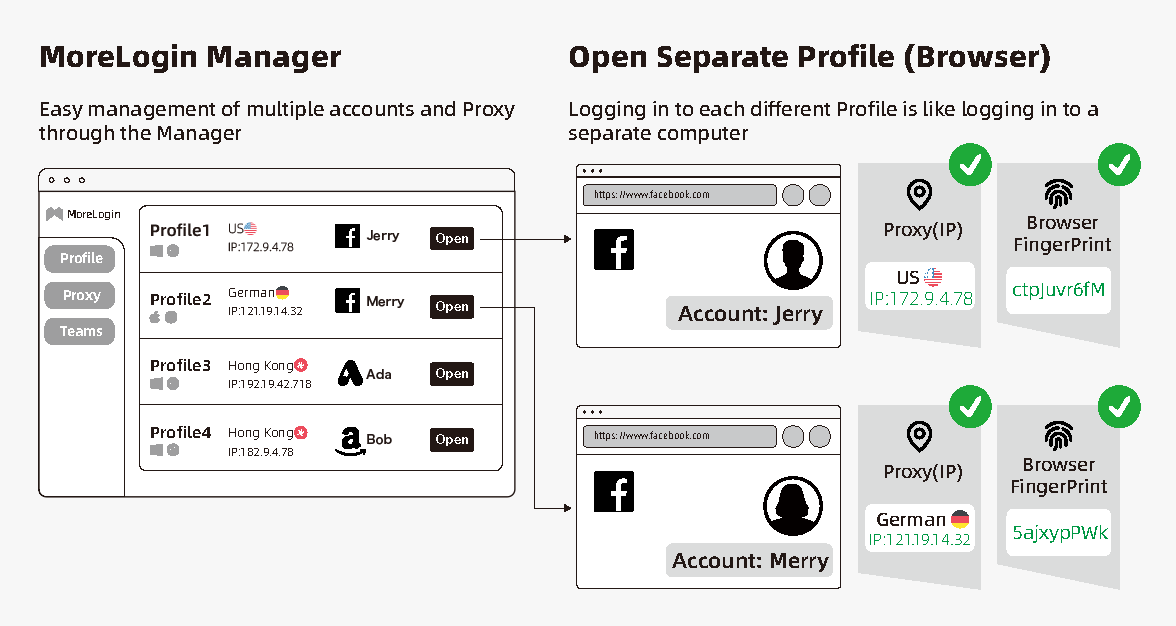
MoreLogin antidetect browser simplifies managing multiple accounts and proxies. As shown below, in our system, think of a Profile as a separate real computer browser. Each computer needs its own proxy configuration. This way, each account login is isolated, reducing platform detection and account bans.
Now, let's talk about how to set up IPOasis using MoreLogin.
First, open the MoreLogin Client Manager.
If you haven't signed up with us yet, you can register through:
(https://www.morelogin.com/register/)
Step 1: Adding Proxy
For the way to import IPOasis’s proxy, we recommend bulk import.
Bulk Import:
1. Copy proxies from IPOasis's dashboard
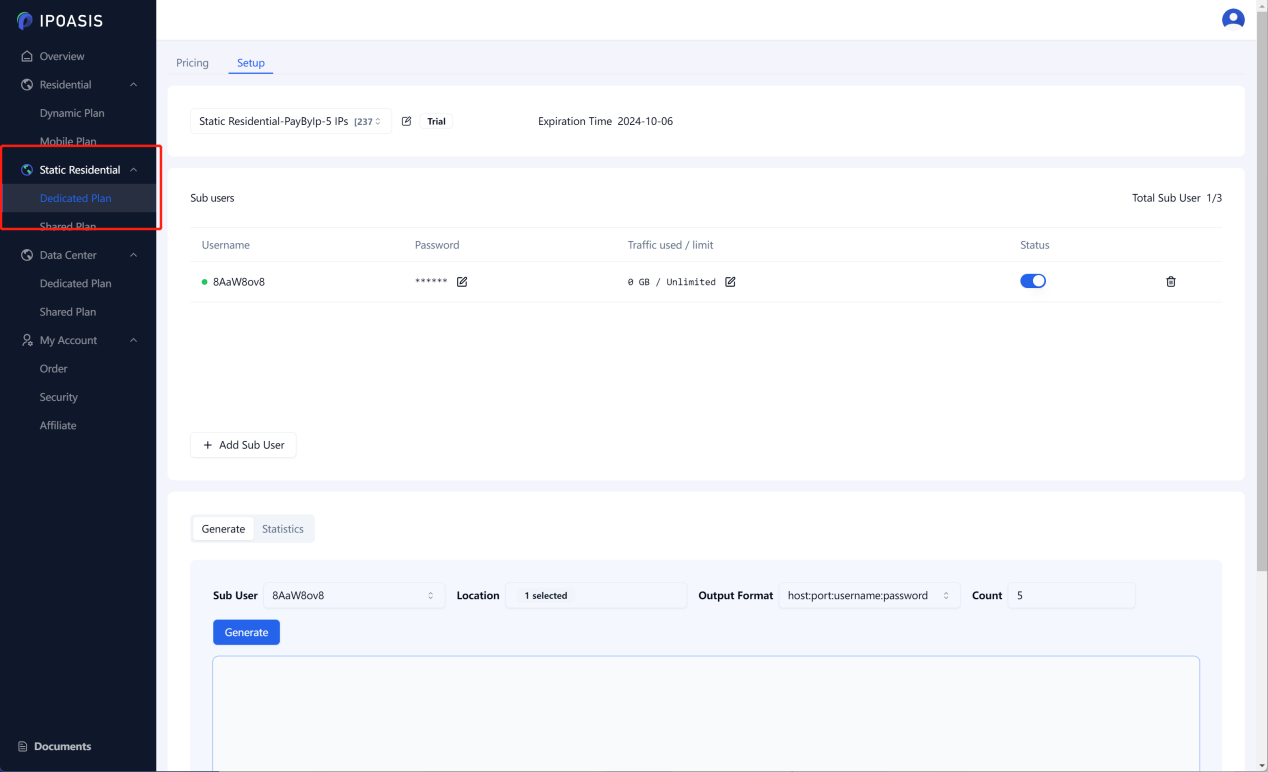
Please go to IPOasis Dashboard and copy the proxies
from: https://www.ipoasis.com/dashboard/overview
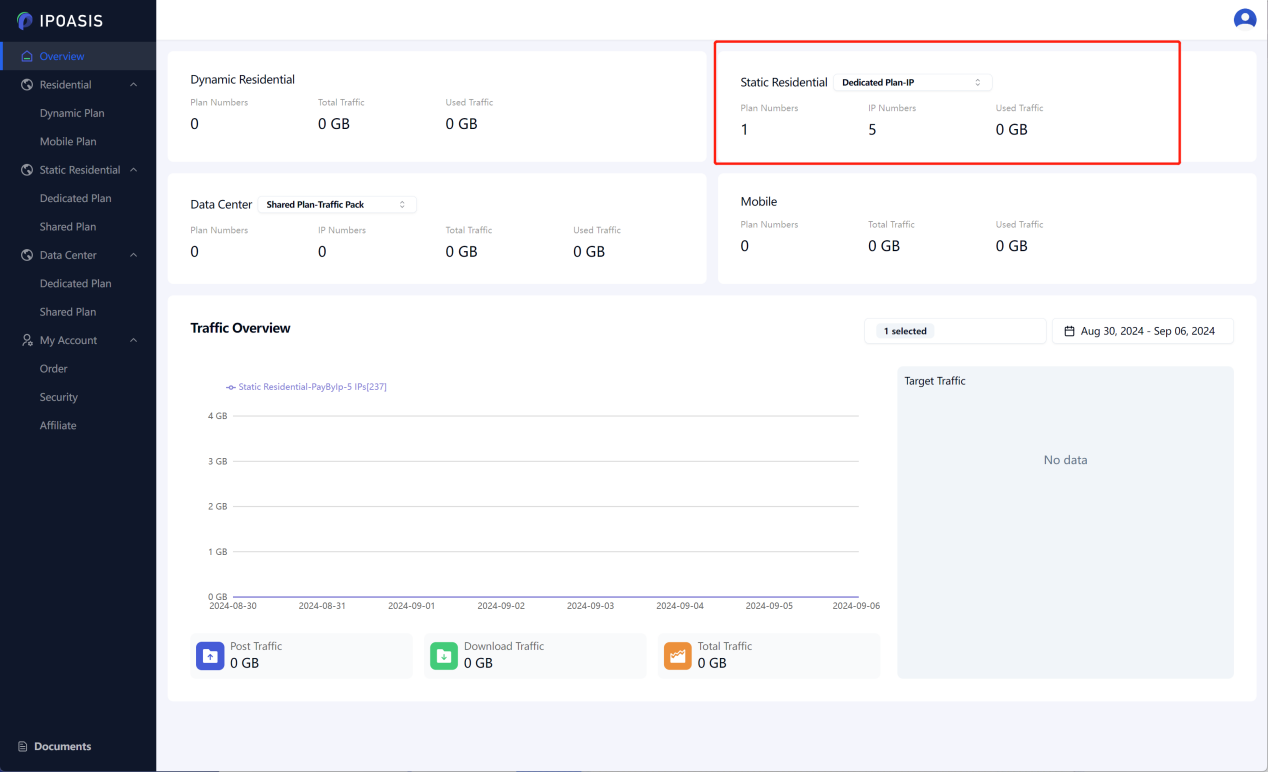
- First check your IP on the overview page
- Click on the section corresponding to the IP
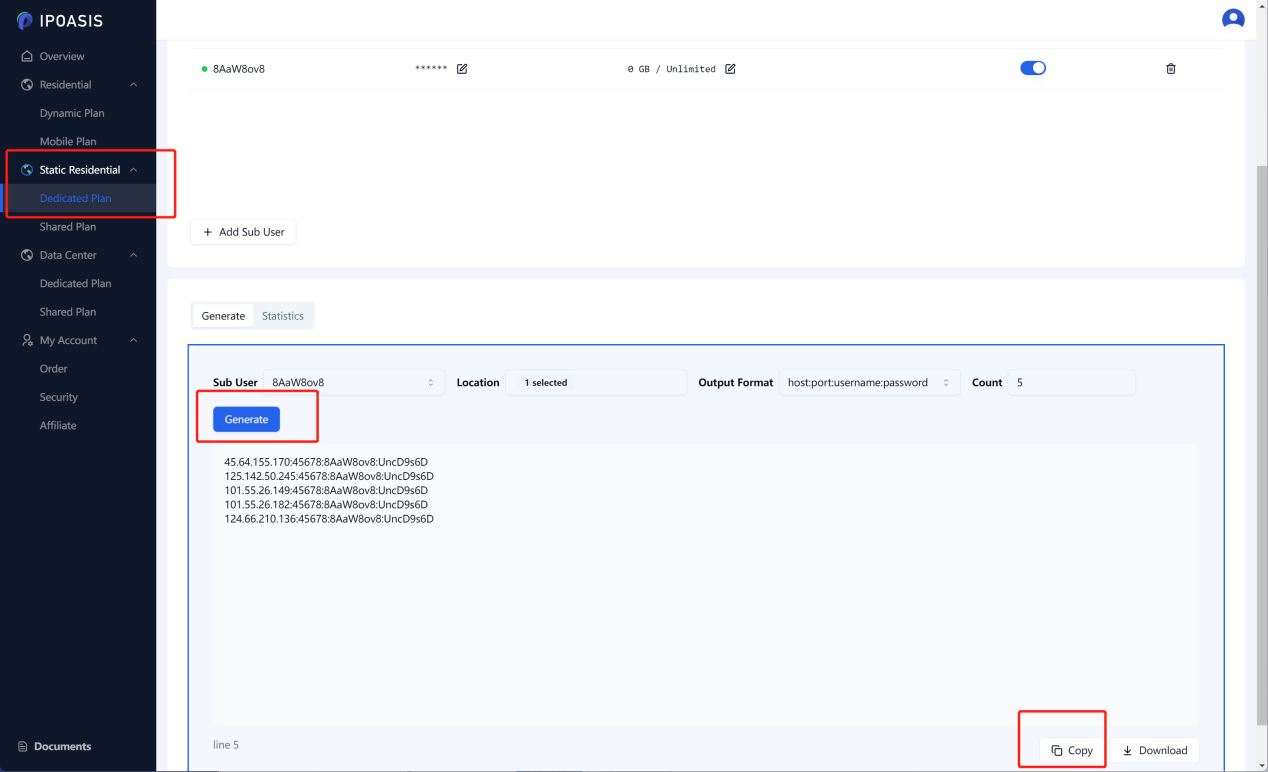
- Click Generate and then Copy
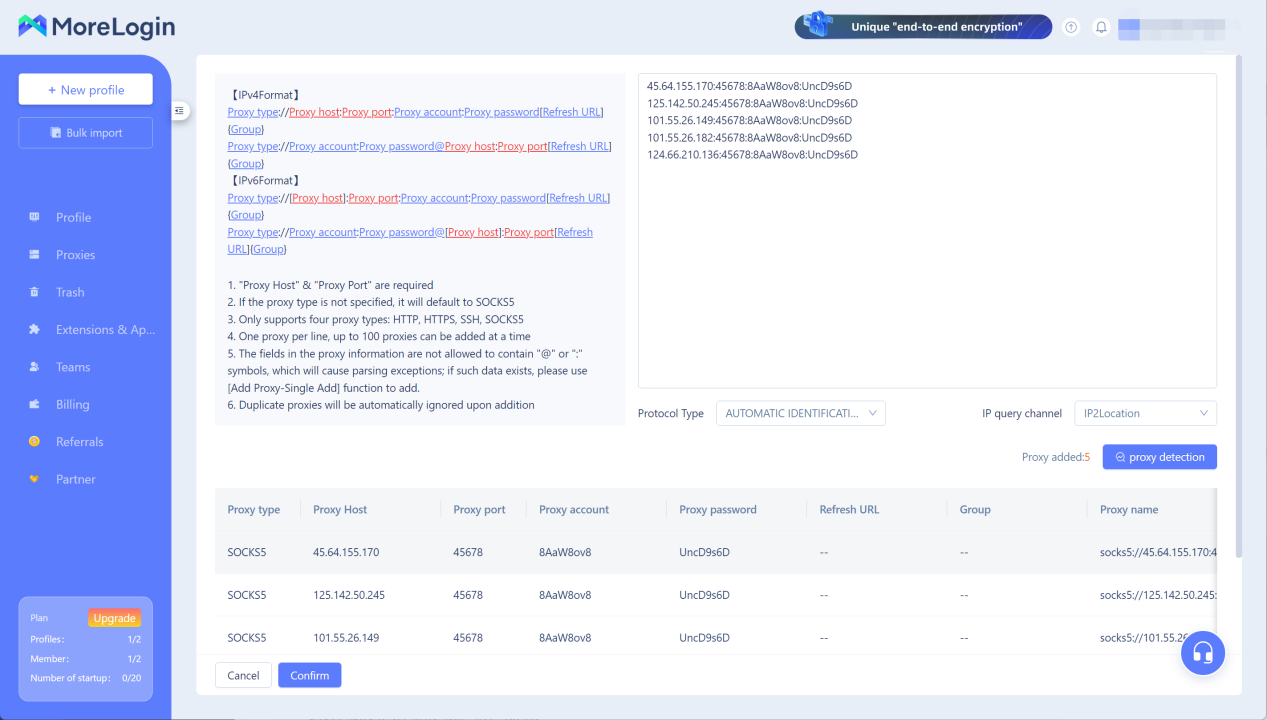
2. Copy proxies from IPOasis's dashboard and then paste the copied information into MoreLogin's "Proxy" section to bulk add.
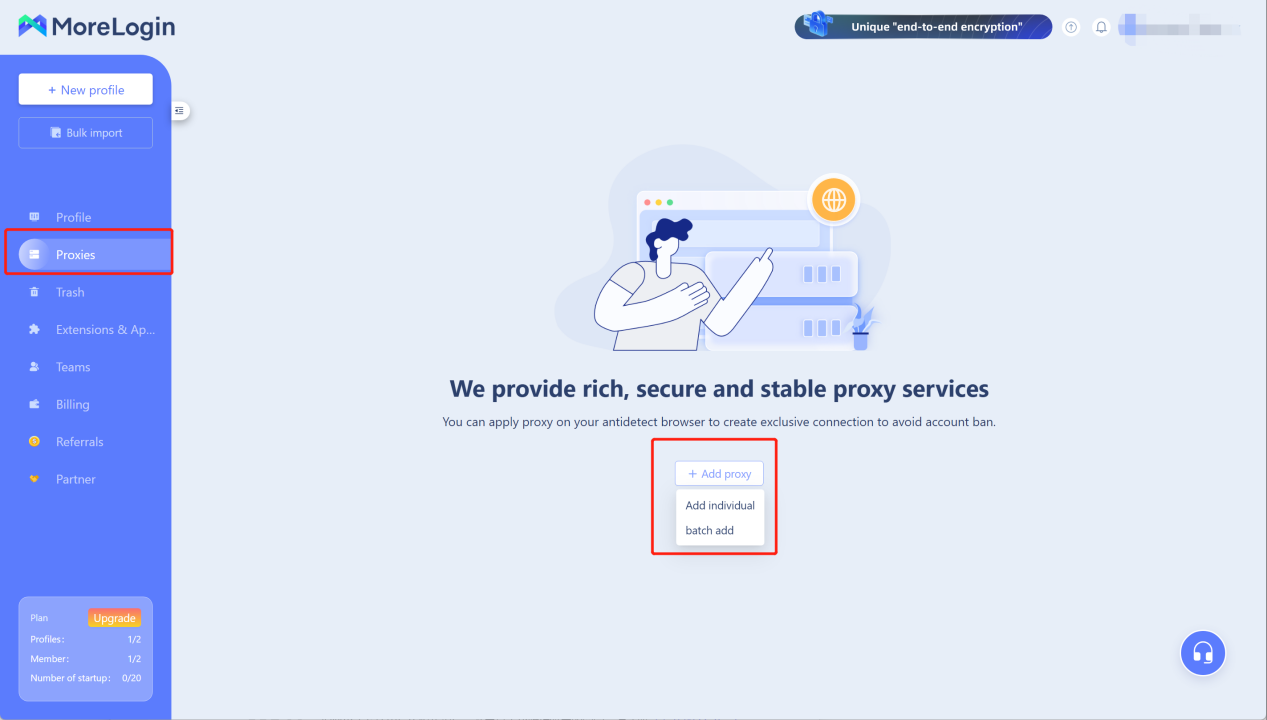
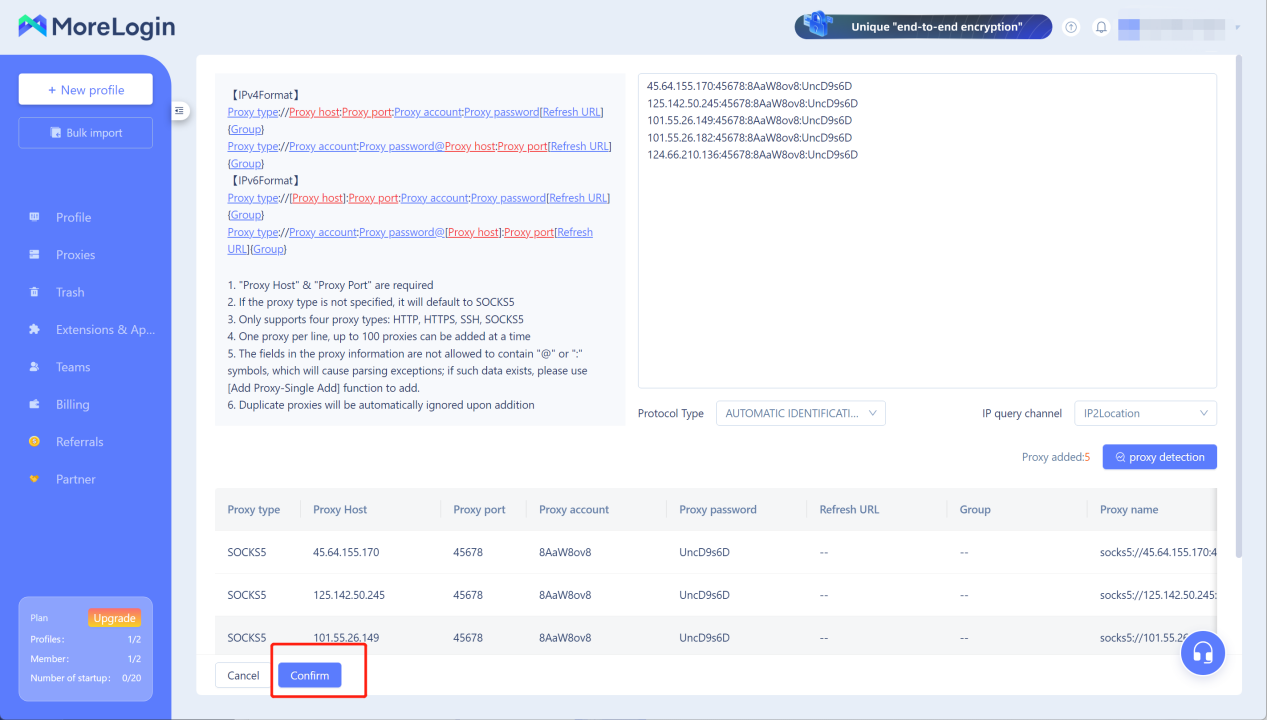
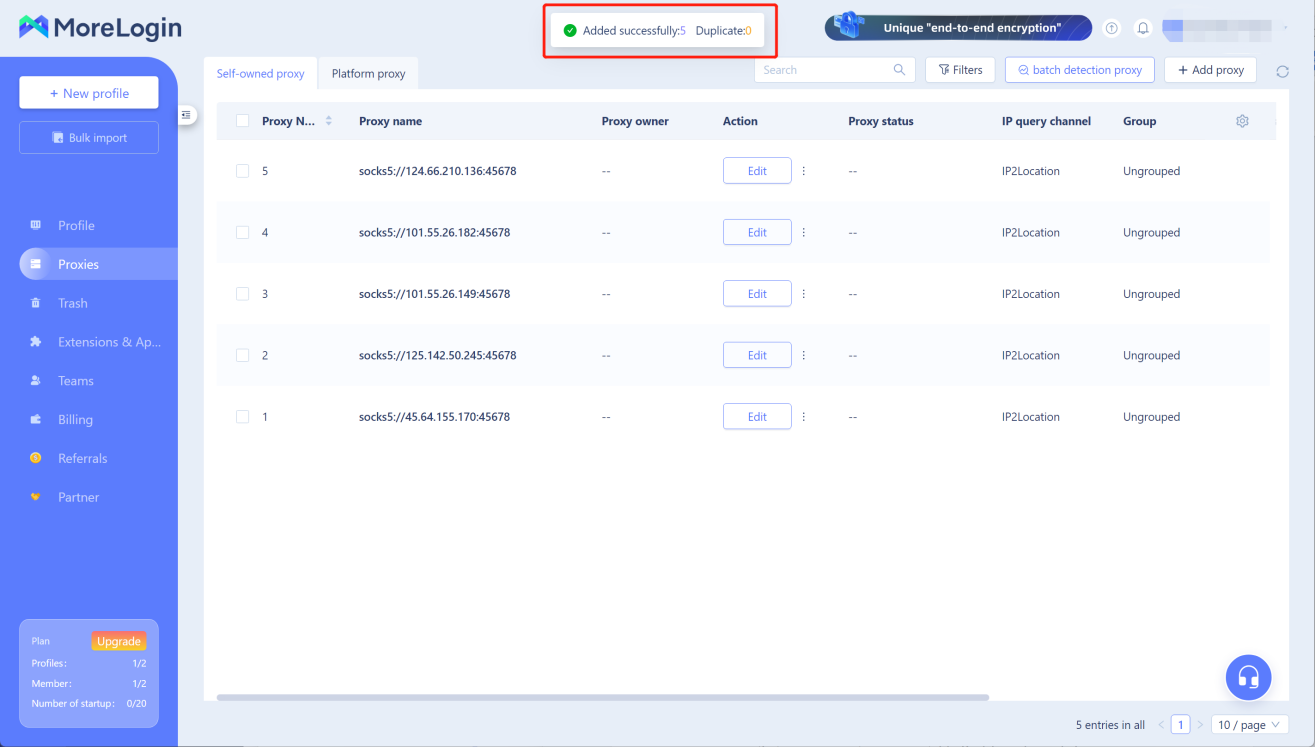
Select "Proxy" (left menu),Click “batch add”, Paste proxy information into the top right hand corner, then click "Confirm".
Step 2: Binding Proxies
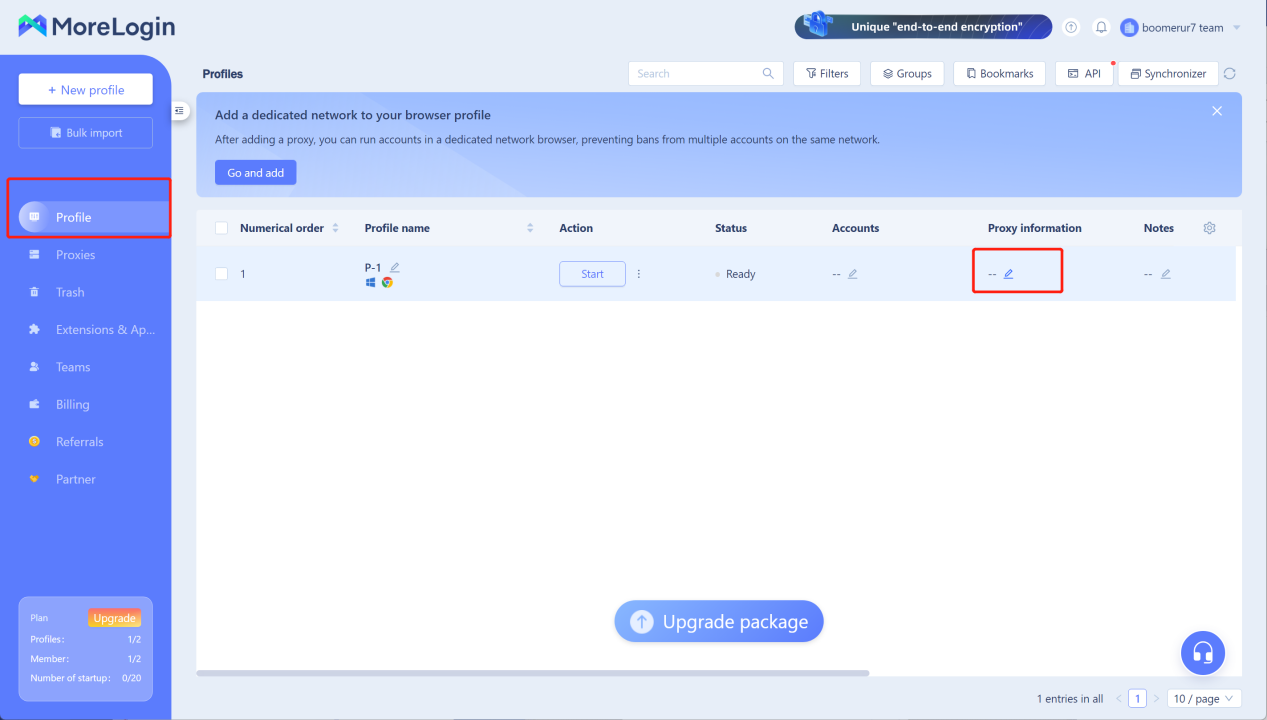
1. Select "Profile" (left menu), then find the Profile you want to configure the proxy for in the list. In the Proxy option, click "Edit".
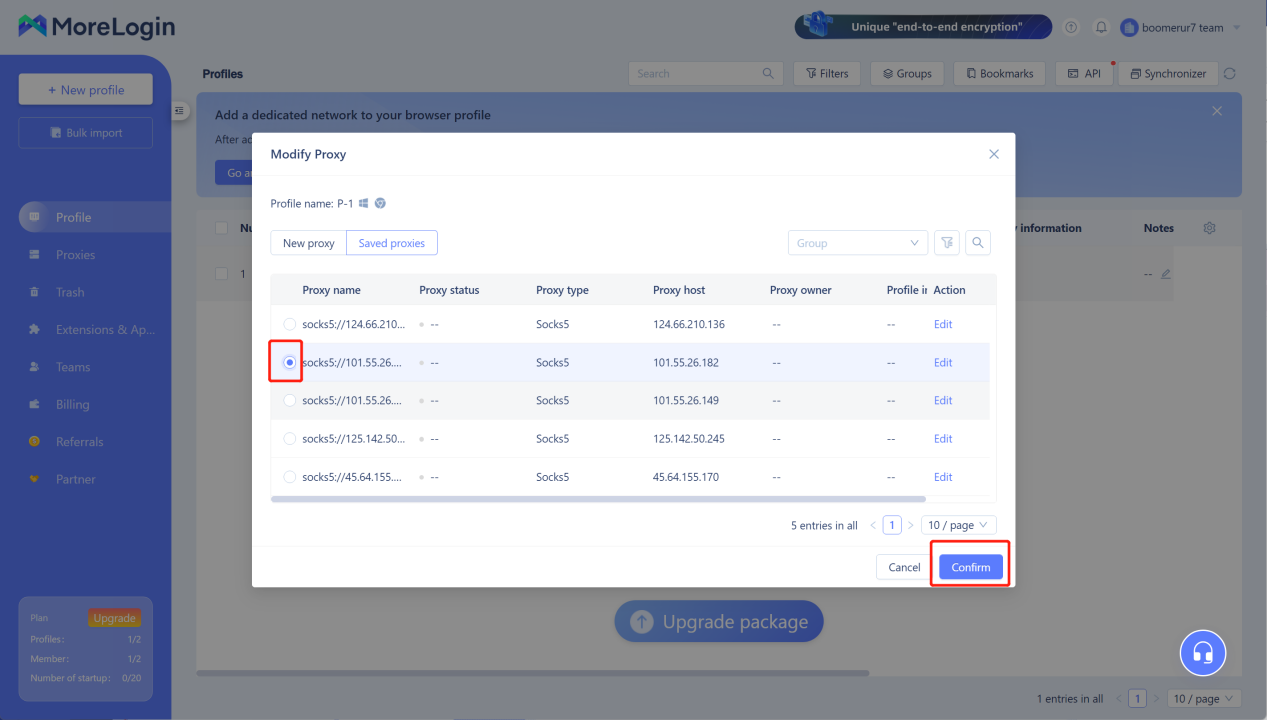
2. In the popup, click "Saved Proxy," choose the proxy to bind, then click "Confirm."
Step 3: Start Browser Profiles
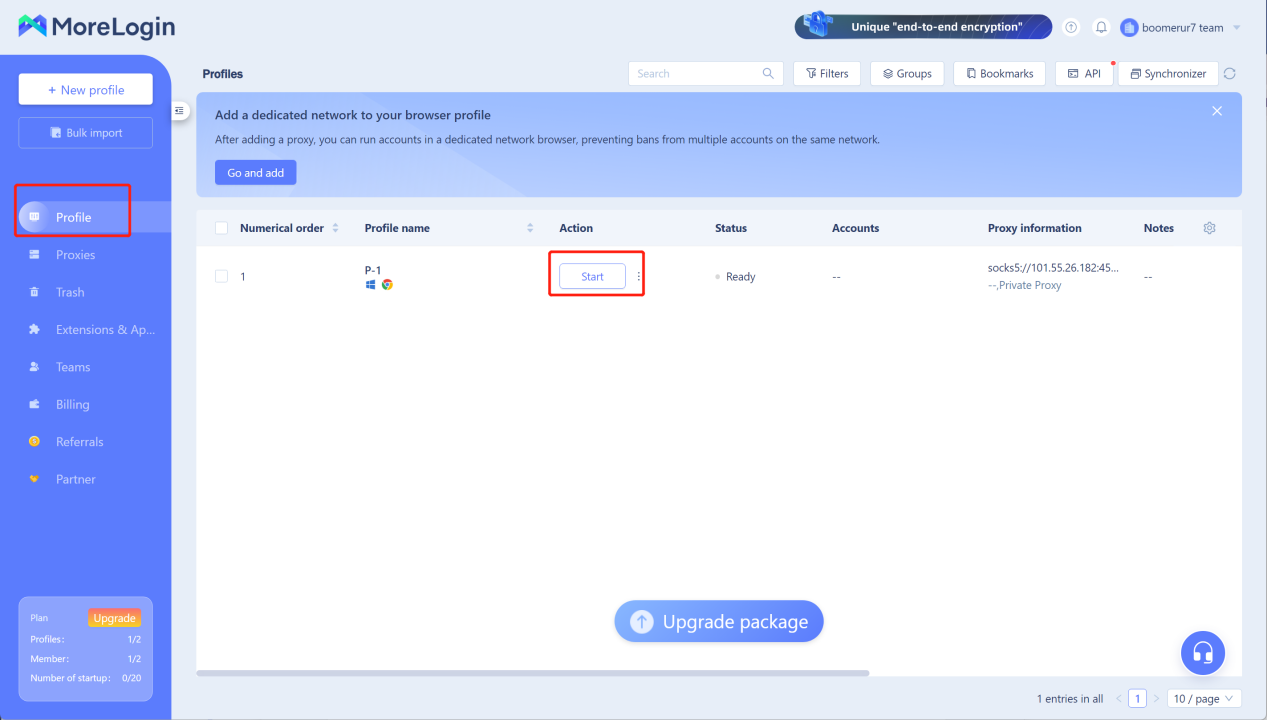
Once the proxy is bound, you can start the Profile, and it will automatically detect and alert you if there are any proxy issues. This ensures that your account runs in a stable Profile and avoids bans.
Select "Profile", then find the newly configured "Profile" in the list and click"Start."
Then you're ready to start!