Extensions

Add Extension-Chrome App Store
- Click on 'Extensions & Apps' in the left navigation bar to open the browser extensions page. Click 'Add Extension' in the top right corner. Take Cooke-Editor as an example
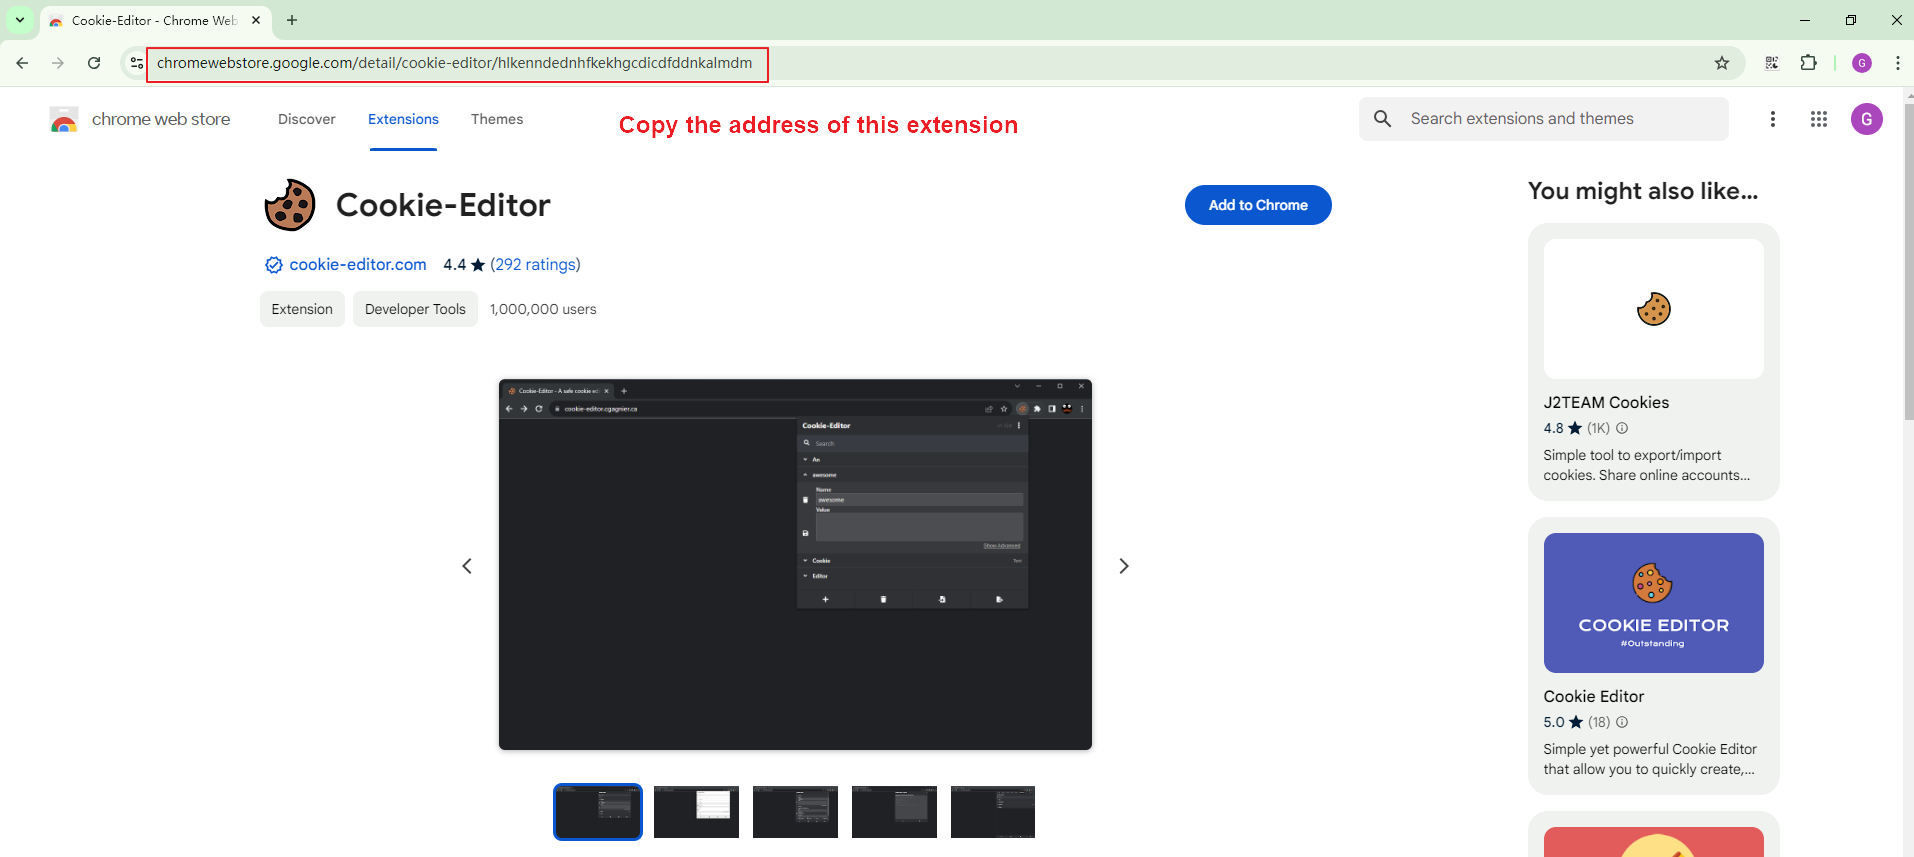
- In your local Chrome browser, visit the Chrome Web Store, search for the extension you want to upload, and go to the installation page for that extension. Copy the URL from the address bar.
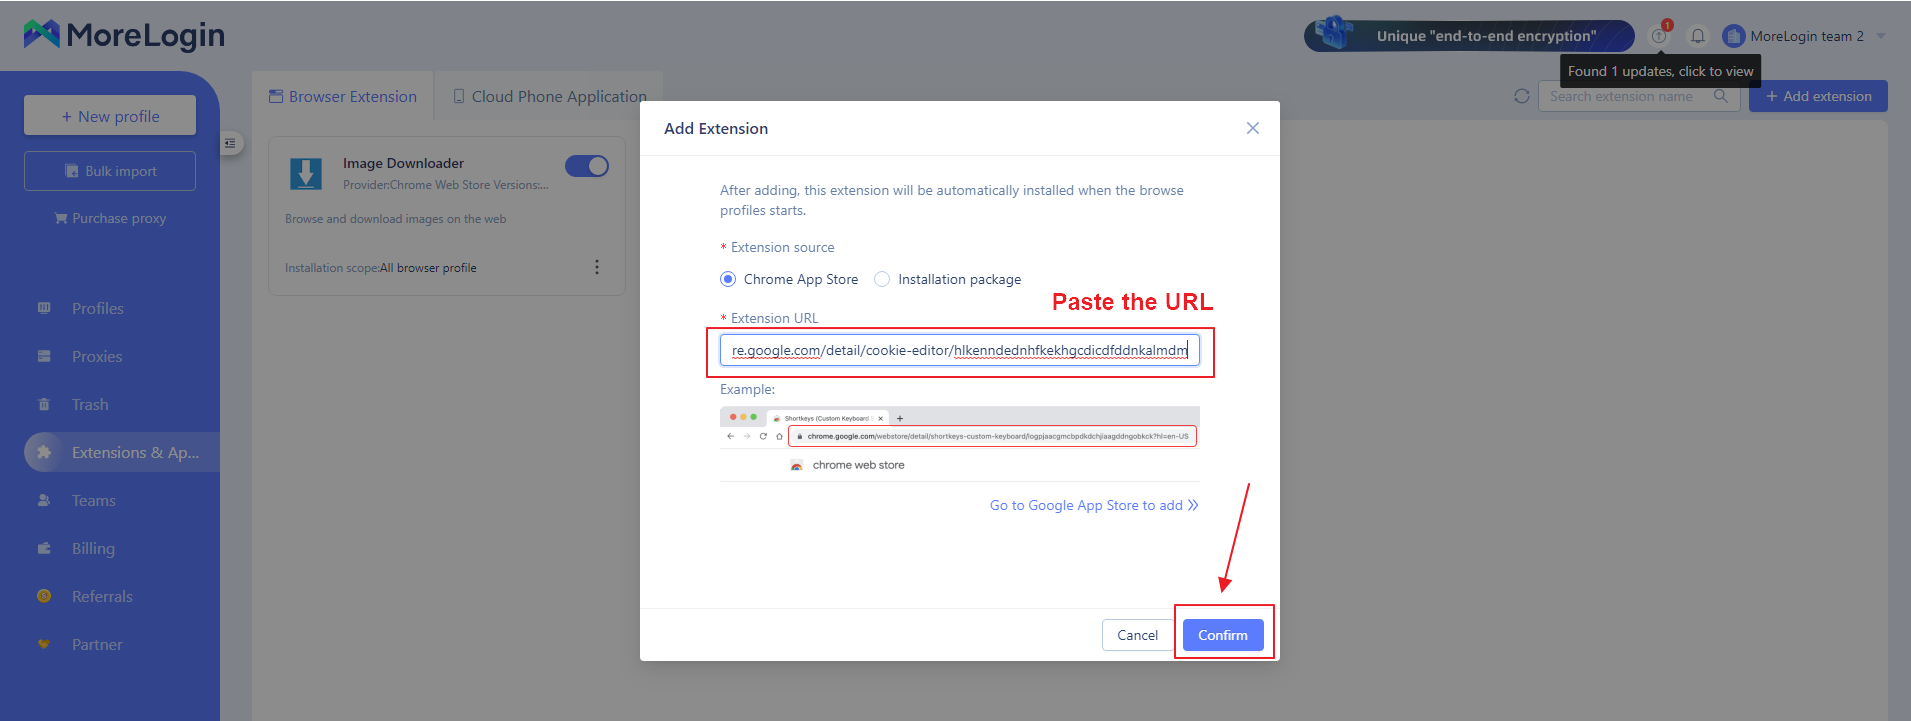
- Paste the extension URL into the input box, then click 'Confirm' below to complete the installation.
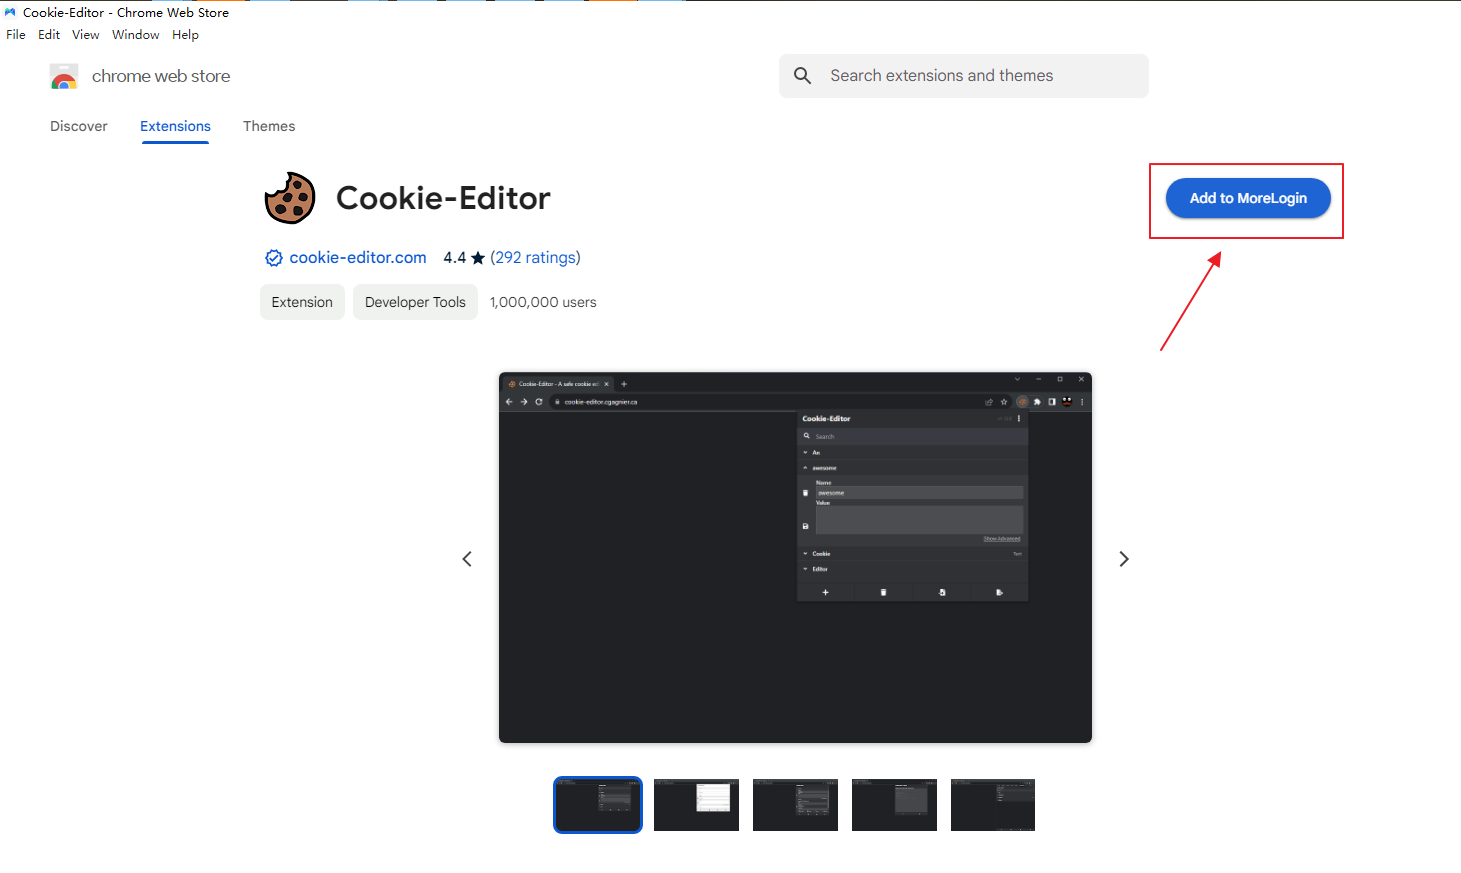
- Alternatively, you can click 'Add from Google Web Store' to be redirected to the Chrome Web Store, and click 'Add to MoreLogin' to install successfully.
Add Extension-Installation Package
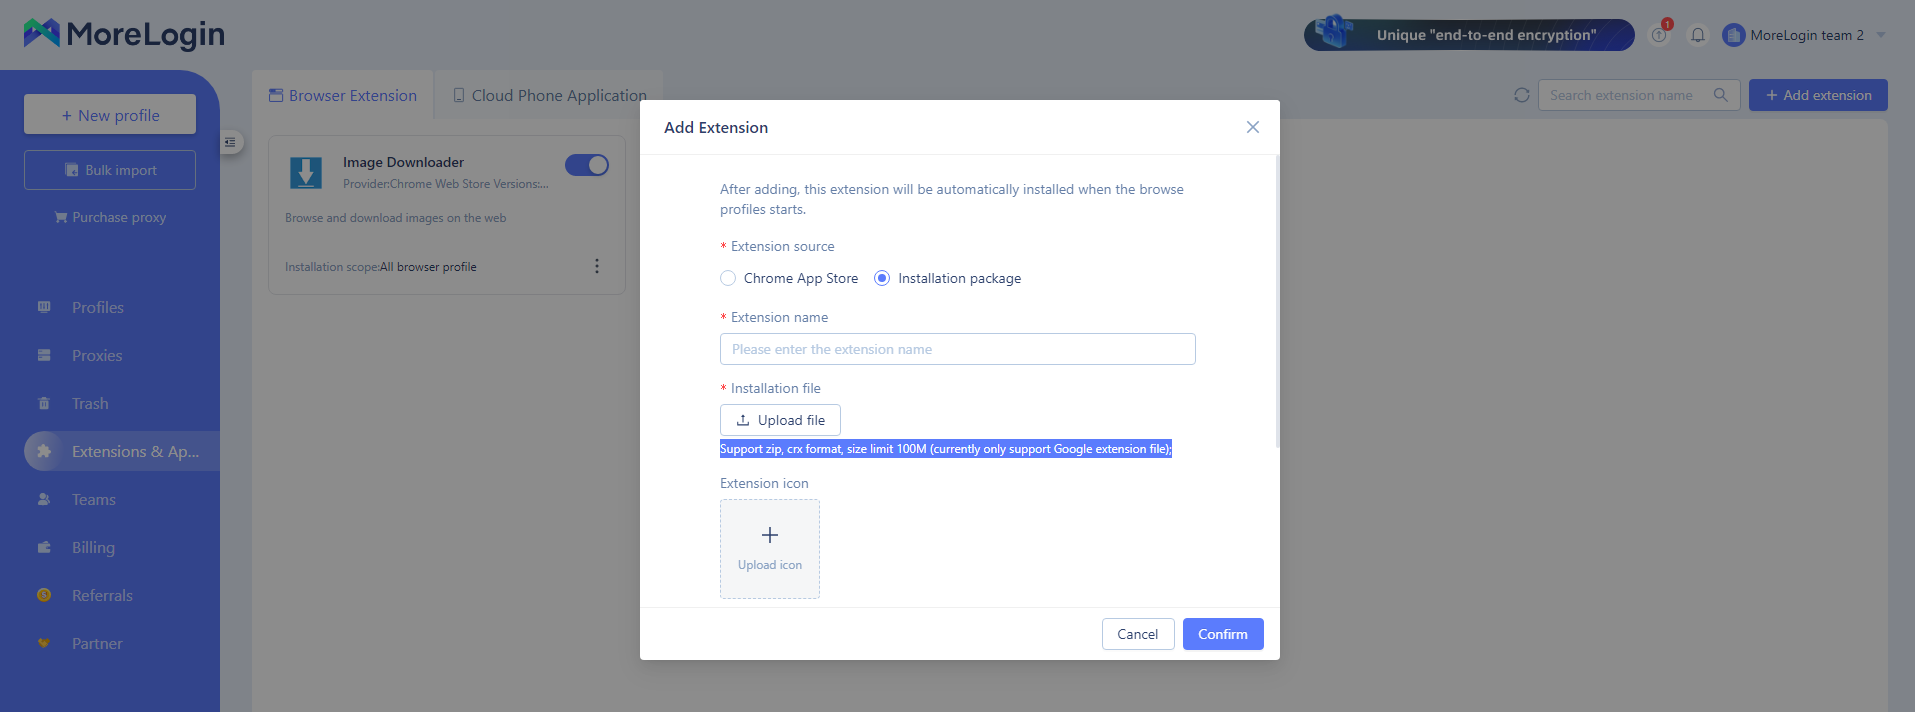
- Click on 'Extensions & Apps' in the left navigation bar to open the browser extensions page, and then click 'Add Extension' in the top right corner.
- Next, enter the name of the extension.
- Then, in the installation file section, click 'Upload File': supported formats include .zip and .crx, with a size limit of 100MB (currently only support Google extension file).
- Add an extension icon, and then click 'Confirm' to complete the installation successfully.
Extension Configuration
- Enable extension: After clicking the enable button, the extension will be installed in the browser profiles within the configured scope. After clicking 'Confirm', the extension will be displayed once the browser profiles within the configured scope are started.

- Disable extension: After clicking the disable button, newly created browser profiles within the configured scope will not display the extension when started.
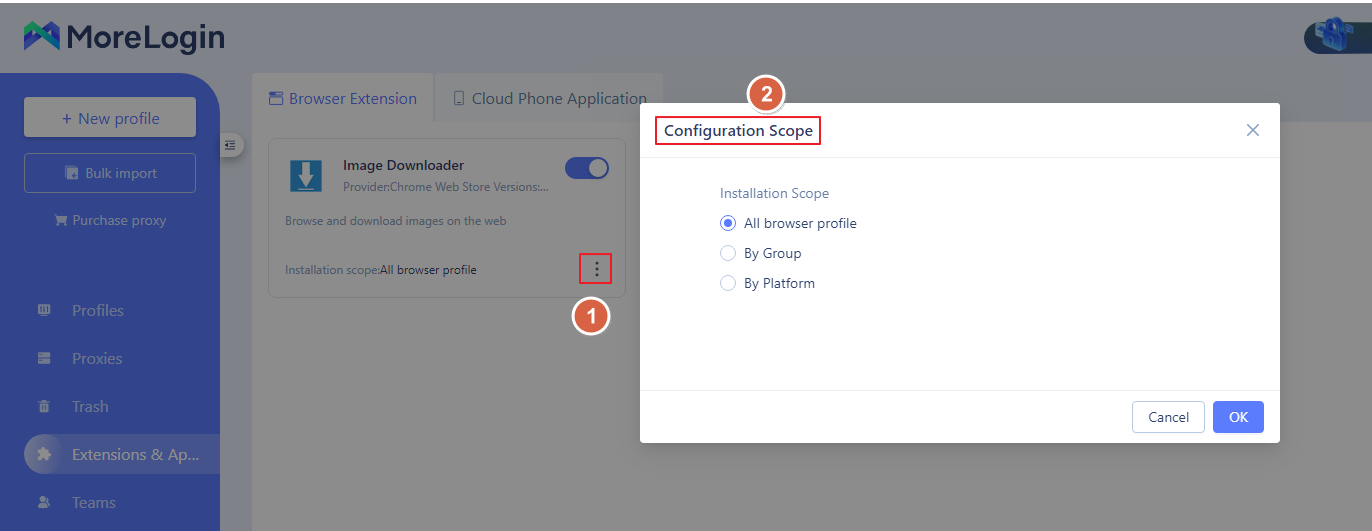
- Configuration Scope: You can choose the installation scope (all profiles, by group, and by platform).
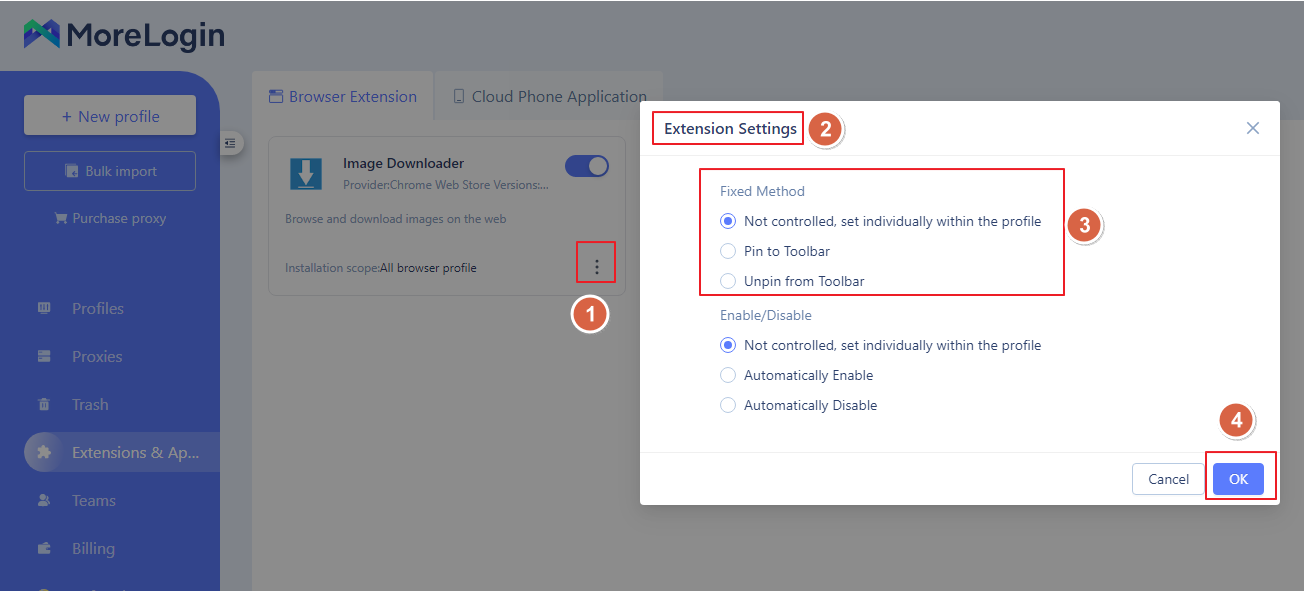
- Extension Settings-Fixed Method
There are three options (the latter two are more convenient when using the synchronizer):
- No control, set individually in the profile: After selecting, you can freely control the extension within each profile based on specific needs.
- Pin to Toolbar: After selecting, all extensions within the configured scope will be pinned to the toolbar.
- UNpin to Toolbar: After selecting, all extensions within the configured scope will not be pinned to the toolbar.
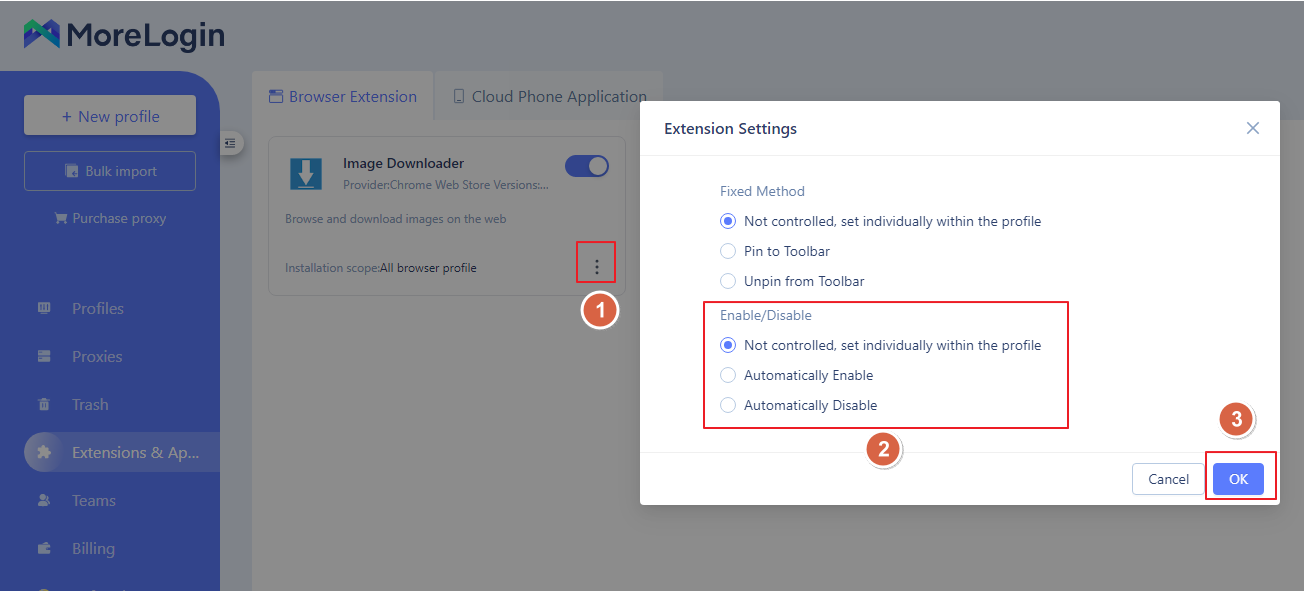
- Extension Settings-Enable/ Disable
There are three options:
- No control, set individually in the profile: After selecting, you can freely control the extension within each profile based on specific needs.
- Enable automatically: After selecting, all extensions within the configured scope will be automatically enabled.
- Disable automatically: After selecting, all extensions within the configured scope will be automatically disabled.
Delete Extension
- Find the extension you want to delete, click 'three dots', and then click 'Delete.
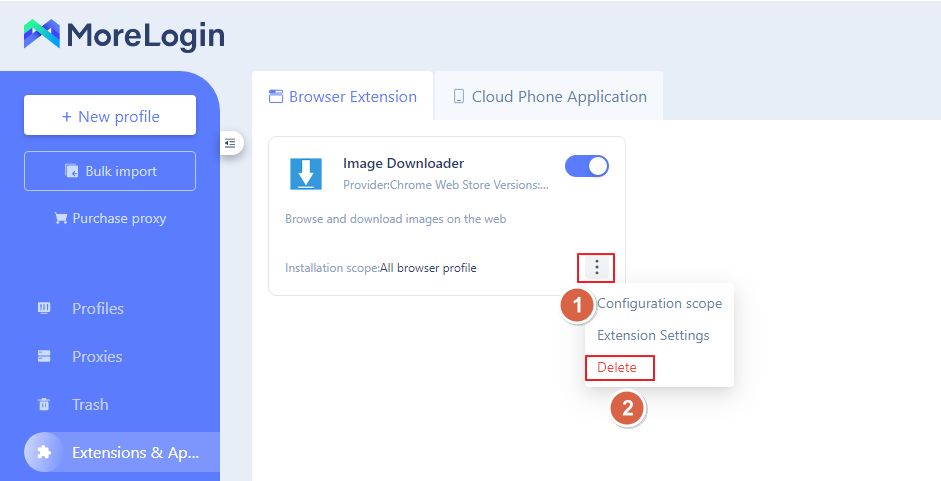
Note: After deletion, the extension will not be present in newly created profiles. However, for profiles that already have the extension, both the data and the extension will remain. To delete the extension, you will need to remove it manually within each profile.